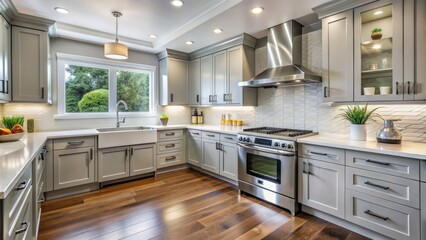
Cabinet painting is a major project that takes several days to complete. The exact duration depends on your kitchen’s size, the initial condition of your cabinets and how much preparation is required.
Begin by cleaning your cabinets with a degreaser and sanding any rough spots to prepare for priming. Then, label and organize hardware to simplify reassembly. Contact Cabinet Painting Sacramento for more details.
Preparation
Before you start painting, it is important to thoroughly clean your cabinets. This step ensures that any grease or grime is removed from the surfaces, and helps the paint adhere properly. Use a degreaser spray or warm water and a soft cloth to wipe down the surfaces, and focus on high-touch areas like drawer pulls and edges. If necessary, patch any cracks or imperfections with wood filler and sand the surfaces to smooth them. If you have any hardware holes to re-hole, be sure to do so before moving on to the next step.
It’s also a good idea to protect any surfaces you don’t want to get paint on, such as countertops or appliances, by covering them with drop cloths. You should also make sure to clear out and label any cabinet doors or drawer fronts before you start working, and take photos if possible. This will save you a lot of time and frustration when it comes to reassembly later on.
The condition of your cabinets will also have a big impact on how long the job takes. New cabinets are usually in pristine condition, and will require less preparation work than older cabinets that have been painted or stained before. You should also factor in how many cabinets you have, as this will increase the amount of surface area that needs to be painted.
Once the surfaces are cleaned, sanded, and prepped, it is time to begin the painting process. The best way to paint cabinets is to use a sprayer for the bigger flat surfaces, and an angled sash brush for corners and details. Be sure to apply several coats, and allow each coat to dry fully before applying the next one.
Depending on the size of your kitchen, the number of cabinets, and your skill level, the total project can take from a weekend to a week to complete. A professional cabinet painter will have a much faster turn around time, and can provide you with a better quality finish that will last longer than a DIY job. Be sure to compare quotes from a few different companies, and ask about their preparation process, product brand, and workmanship warranty to ensure you’re getting the best value for your money.
Priming
This is the most time-consuming phase of cabinet painting. It includes cleaning and sanding surfaces, filling cracks, and repairing dents and chips. It’s important to take your time to ensure the final paint job will last. If you skip these steps, the new paint could start chipping or peeling soon after it’s applied.
This step starts with a thorough clean to remove grease, dirt, and grime from the surface. It’s also a good opportunity to repair any minor damage like holes, dings, or dents. You can use a degreaser or warm water with a splash of dish soap to loosen stuck-on debris and wipe the cabinets down. Once the surfaces are clean, lightly sand the cabinet frames using 120 to 150 grit sandpaper. Be sure to wipe away any sanding dust between steps or it will mess up the finish later.
Then, apply a quality primer. Choose a primer designed for cabinetry that will help the paint stick and block stains or wood grain from showing through. A high-quality primer like Fresh Start High-Hiding All-Purpose Primer is a favorite of professional painters.
Once the primer is dry, you can start painting. Again, this can vary depending on the type of paint you select, but expect to need at least two coats. It’s best to use a high-quality brush for corners and detailed areas, while rollers work well on flat surfaces. A spray gun can speed up the process but requires more expertise to use safely.
Once the paint is applied and dried, you can reattach the doors and hardware. Then, you can enjoy your newly refreshed cabinets! Studies show that refreshed cabinets make homes sell faster, so you can expect to recoup your investment when it’s time to move on.
Painting
Cabinet painting isn’t as simple as opening a can of paint and swiping it on. There are many steps involved in this process, including priming, sanding, and multiple coats to achieve a professional-looking result. Taking the time to properly prep your cabinets for painting will ensure that your new finish lasts longer and looks better.
During the painting phase, it’s important to keep in mind that the number of coats needed will depend on the color and type of paint used. It’s also important to allow the paint to dry between coats, which may take 2-4 hours. It’s also recommended to use a sprayer during this phase, as it will help speed up the process and produce a smooth, even finish.
When spraying, it’s also important to mask off countertops and appliances to protect them from overspray. A good quality painters tape will provide an extra layer of protection and prevent any paint from transferring to areas it shouldn’t be. Additionally, it’s a good idea to remove the hardware from the cabinets and use wood filler or spackle to patch any imperfections or holes in the cabinet frame or doors. This step typically takes 1-2 hours.
After the primer is fully dry, it’s time for the cabinet paint to be applied. This can be done either by brush or with a sprayer, although it’s recommended to spray for the best results. Spraying requires more practice and technique than brushing, but once you get the hang of it, it can be much faster and give you a more professional-looking finish.
Depending on the type of paint used, it may require several coats to achieve full coverage and a smooth, even finish. It’s essential to let each coat fully dry between applications, which will take 2-4 hours per coat.
Once the final coat is applied, it’s time to reattach the cabinet doors and hardware. Be sure to label the hardware before removing it to save yourself time during the reassembly process. It’s also recommended to wait until the paint is fully cured before using the cabinets, as this will help prevent smudges and other damage.
Drying
The final phase of cabinet painting involves applying a coat or two of paint and allowing it to dry. This can take up to 48 hours, and it’s important to be patient and to exercise caution. During this time, you should avoid touching or handling the cabinets to prevent smudges and other damage.
It’s also important to note that the drying process is influenced by environmental conditions such as humidity and temperature, so it’s essential to plan accordingly. For instance, painting during a cold winter can significantly slow down the drying process. In addition, hot or humid weather can impact the adhesion of the paint and may result in flaking or other issues.
Generally speaking, it takes about three to 10 days to complete a kitchen cabinet painting project depending on the size of your kitchen and the desired finish. However, proper preparation work can reduce the overall painting time by up to 40%.
Proper prep work includes thorough cleaning, deglossing and sanding, chemical stripping in certain cases, wood filler, high-quality primer, and finally painting. The actual painting method — whether spraying or brushing — can also have a significant impact on the overall project duration.
If you’re aiming for a premium finish, you will likely need to apply multiple coats of paint and allow each to fully cure. This will add an additional 2-4 hours per coat of application and 24 hours of drying time, adding to the total painting time.
In addition, the quality of your paint and the skill level of your team can also have a significant impact on how long it takes to complete the project. A professional, experienced team can often get the job done in a fraction of the time it takes a beginner to achieve comparable results. It’s important to consider these factors when planning your renovation project, as they can significantly affect the end result and the cost of your project. By following the best practices, you can ensure a beautiful, professional-looking finished product within a realistic timeframe.